
Table of Contents
’''
- Automating a Recipe Server Deployment: FastAPI, Terraform, and Ansible in a DevSecOps Workflow
- Project Overview - Directory tree
- Network Diagram
- FastAPI
- Administration Node Setup
- Terraform provisioning
- Ansible Vault
- Ansible playbook
-
- Install dependencies and packages
-
- Linux configurations
-
- MySQL Configuration
-
- Python packages and FastAPI app
-
- Automation with bash
- Conclusion
- Resources ’''
Last year, I advanced my expertise in cloud technologies—including Ansible, Terraform, and AWS—with the goal of mastering Cloud Security and DevSecOps. This project, a FastAPI-based Recipe Server, became my hands-on experiment to automate end-to-end deployment, from infrastructure provisioning to application setup, while prioritizing security best practices.
While using FastAPI for work-related tasks, I challenged myself: “Could I fully automate this deployment using Ansible for configuration management and Terraform for cloud infrastructure?” Though simpler solutions like serverless deployments or Docker containers exist, I chose this path after hearing a powerful statement from cybersecurity educator: “Security begins with mastery—learn a technology inside-out, then secure it.” This philosophy reshaped my approach. Instead of chasing surface-level cybersecurity skills, I dove deeper into cloud architecture and deployment workflows, ensuring I could build and secure them effectively. GITHUB REPO: Intro to DevOps
Project Overview
The goal of this project was to automate the deployment of a small FastAPI application that manages recipes. Below is an outline of how everything was set up:
- Administration Node: An Ubuntu Server 22.04 LTS virtual machine to run Ansible and Terraform.
- Terraform for Provisioning: A Terraform script to create and configure the necessary AWS resources (an EC2 instance, a VPC, a subnet, internet gateway, and routing table).
- Ansible for Configuration: An Ansible playbook to install and configure all required software on the EC2 instance, including MySQL, Python, and other dependencies.
- FastAPI Application: A simple FastAPI app (with SQLAlchemy for database operations) that stores recipes, associated with a user ID. (For simplicity, there is no authentication system.)
Directory tree
The ansible and terraform directories separate IaC configurations, while app houses the FastAPI codebase.
FastAPI_MySQL/
├── ansible
├── app
│   ├── __pycache__
│   ├── static
│   ├── templates
├── docker
└── terraform
Network Diagram

FastAPI
I choose FastAPI for its speed, ease of use, and built-in support for modern Python features. Compared to Flask, FastAPI felt more intuitive and allowed me to focus on the core functionality of the recipe app without getting bogged down in boilerplate code. On the other hand,I enjoy writing in Python, and after trying Flask and Django, I wanted to work with FastAPI. The development experience was straightforward and fast. The application itself is a simple recipe manager, storing recipes under a user ID. I chose not to implement authentication for this version, to keep the focus on the automation aspects. SQLAlchemy serves as the ORM layer for database interactions.
Administration Node Setup
The administration node served as the control center for deploying and managing the entire infrastructure. By centralizing the deployment process, I could ensure consistency and security across all components. On the Ubuntu Server 22.04 LTS virtual machine, I followed these steps:
- Clone the GitHub Repository: The repository contains:
- Bash scripts for installing dependencies and deploying the app.
- An Ansible playbook for configuring the server.
- Terraform files for provisioning the AWS infrastructure.
- The Python/FastAPI application.
- Install tools:
- Terraform: Follow HashiCorp’s installation guide.
- AWS CLI: From AWS documentation or distribution packages.
- Ansible: Installed via
pipxto keep it isolated. - Other Dependencies: For instance,
passlibis needed for password hashing in Ansible tasks.
- Configure AWS Credentials: Using the AWS CLI configure the authentication credentials to use the AWS resources. I use the option profile to avoid confusion in the future.
aws configure --profile personal
export AWS_PROFILE=personal
4.Create an EC2 Key Pair: I chose to manually create the key pair to avoid unnecessary complexity with Terraform’s key management and the associated SSH commands. While I am aware that reusing the same key for multiple EC2 instances is not a best practice, this project is strictly for non-production purposes, so key rotation and stringent security measures are less critical here.
aws ec2 create-key-pair --key-name tf_key | jq -r ".KeyMaterial" > ~/.ssh/ec2_key.pem

chmod 400 ~/.ssh/ec2_key.pem

ssh-add ~/.ssh/ec2_key.pem
Then the script installed_tools.sh uses apt to install the necessary packages. After that, I used pipx to install Ansible. This approach creates isolated environments in the CLI, and the inject command is used for adding additional dependencies. It’s particularly important to install the passlib package for password hashing when creating a new server user, following best practices by storing only the hash rather than the actual password. Finally, I installed Terraform according to HashiCorp’s documentation, as well as the AWS CLI.
Terraform provisioning
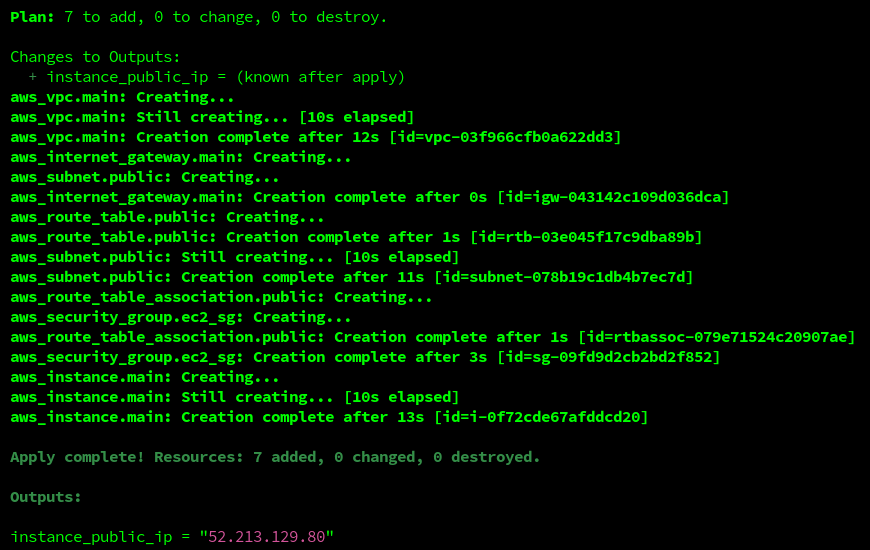
Terraform was the ideal choice for provisioning the infrastructure because of its ability to manage cloud resources declaratively. By defining the infrastructure as code, I could easily replicate the setup in different environments, scale or destroy it as needed. Terraform will provision:
- An EC2 instance in a public subnet.
- A VPC, subnet, internet gateway, route table, and security group.
Terraform’s output includes the public IP of the EC2 instance. This IP is stored in the
INSTANCE_IPvariable, which is used to update the Ansibleinventoryfile via asedcommand.
Ansible Vault
To protect sensitive information like database credentials and user passwords, I used Ansible Vault to encrypt the data. This ensured that even if the playbook was exposed, the sensitive information remained secure. To handle sensitive variables, I used Ansible Vault to encrypt the data needed in the playbook, such as the username, database credentials, and other confidential information.
ansible-vault create vars.yml
After create the file the editor vim is opened to configure all the variables on the vault. This is a template on which variables are needed to run the playbook:
username: "fastapi"
user_password: "fastapi"
password: "fastapi"
db_user: "fastapi"
db_pass: "fastapi"
db_name: "recipes"
db_host: "localhost"
dependencies_packages:
- python3-pip
- python3-dev
- python3-setuptools
- python3-venv
- python3-passlib
- mysql-server
- mysql-client
- python3-mysqldb
- libmysqlclient-dev
- libpwquality-tools
Ansible playbook
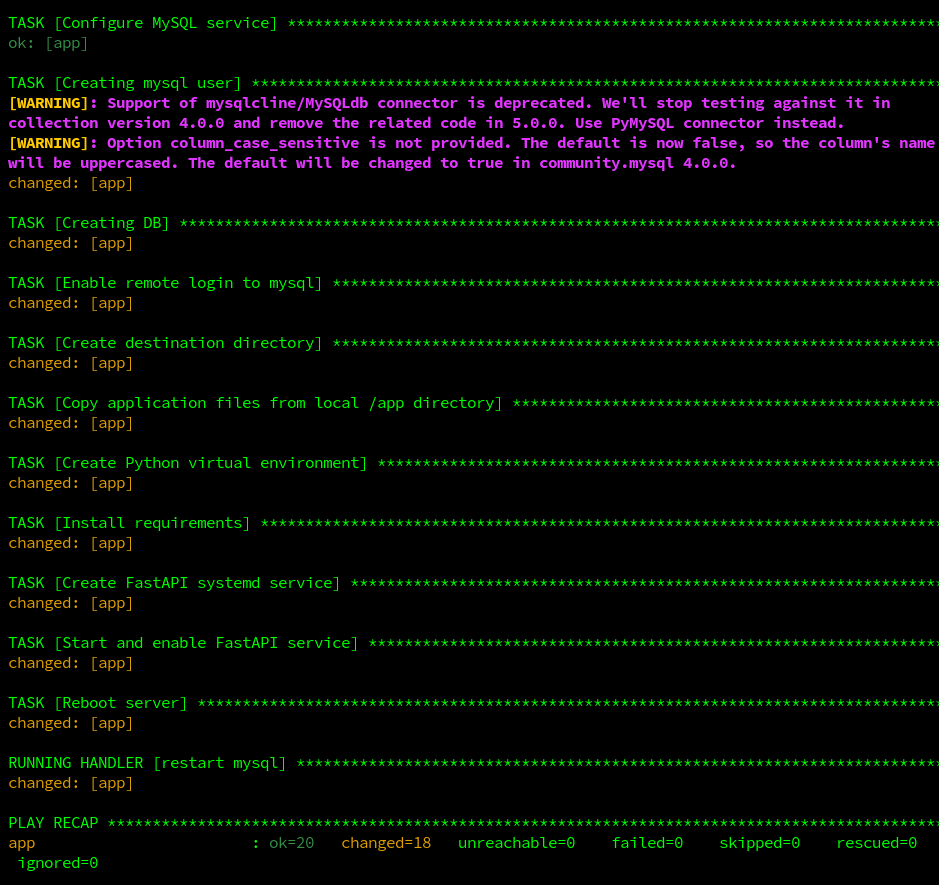
The Ansible playbook was the backbone of the deployment process, automating everything from dependency installation to MySQL configuration. By breaking down the tasks into manageable steps, I could ensure that each component was set up correctly and securely.
1. Install dependencies and packages
After configuring SSH and setting up the infrastructure on the administration node, it was time to run the Ansible playbook to prepare the environment for running the FastAPI framework. The first task was to update the package manager’s cache and install the necessary software, such as Python, pip, python3-venv and MySQL.
2. Linux configurations
Next, a user group and a deployment user account were created, followed by implementing security measures like setting a strong password policy, modifying SSH settings, and configuring and enabling the UFW firewall.
3. MySQL Configuration
The next step involved configuring MySQL: starting the MySQL service, creating a MySQL user, setting up the database, and enabling remote login. To complete this step, the notify attribute was used to trigger a handler that restarts the MySQL service.
4. Python packages and FastAPI app
Finally, the Python app setup was addressed. A directory for the application was created, the application files were copied over, and a virtual environment was created. The dependencies for FastAPI and its ORM, SQLAlchemy, were installed. A systemd service file was then created to manage the application, and the service was started and enabled to ensure it runs on boot.
Automation with bash
To deploy all the project I use to bash script, the previously mention install_tools.sh and the other one that automate the deployment named deploy.sh and it does the following:
- Initializing Terraform
- Applying Terraform configuration
- Getting EC2 instance IP
- Waiting for instance to be ready
- Verifying SSH key
- Creating Ansible inventory
- Running Ansible playbook
Finally, after all this steps the script prints the URL that is the instance IP on the port 8000.
Conclusion
This project was a significant step in my journey toward mastering cloud security and DevSecOps. By automating the deployment of a FastAPI-based recipe server using Ansible and Terraform, I gained hands-on experience in infrastructure as code, security best practices, and cloud provisioning. The challenges I faced, such as configuring secure SSH access and managing sensitive data with Ansible Vault, taught me valuable lessons that I can apply to future projects.